|
|
 |
TREKCORE >
GAMING >
HARBINGER > Video
Captures, Page Two
Star Trek Deep Space Nine Harbinger was the first DS9 game created for the PC and Mac. It is one of Star Trek's few
multimedia adventure titles and features some of the best dialog, voice acting, and plot you'll ever find in a Trek game! The purpose
of this collection is to expose Harbinger to a whole new audience in recognition of its tenth anniversary. This second page picks up where
page one left off and covers the entire rest of the game! Remember:
DS9 Harbinger and its "Holosuite Missions" demo CD can still be found on eBay, and actually playing the game is still
recommended.
WARNING: Both the videos and descriptions on this page contain major spoilers! These videos are intended only for those
who have already played the game or will never play the game. Think carefully before putting yourself in the latter category, however, for who knows what
opportunities might present themselves in the future. [Return To Page One]
All of the following video files use the DivX codec (v5.0.5) with MP3 audio in an AVI wrapper.
If you experience problems playing these videos then you may have to download DivX version 5.0.5 HERE
(Linux) or the newest version from DivX.com.
All videos are 480x360 in size. We recommend watching anything with Quark. ;-)
For optimal viewing, treat these videos as you would a movie being watched on your computer: Turn your speaker volume up to a comfortably loud level,
so you can hear as much as possible, and remove sources of light from behind and around the video to improve contrast; an open, mostly light-colored browser or file
window as the background would not be a good idea, nor would a physical room window letting in a lot of ambient light.
Enjoy! To save a file to your computer, right click on the
link and select "Save Target As..."
|
PREVIEW / LINK |
DESCRIPTION |
LENGTH |
FILE SIZE |
NOTE: All characters, except Bannik, are listed in the order they speak.
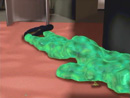 |
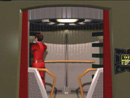
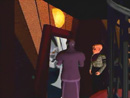
Now that you have the security access code, you finally enter the ambassador's quarters only to find...
that he's been murdered! [Computer, Odo, Sisko, Kira, Dax]
|
6:08 |
27.9 MB |
 |
After reporting back to Ops to discuss things with Captain Sisko, you are assigned to help Odo with the murder
investigation, are promoted to Acting Ambassador in Karrig's place, are informed about the new drone threat, and gain access to Karrig's report from the Gamma
Quadrant. [Dax, Computer, Karrig, Sisko, Odo, Carlton]
|
9:42 |
44.7 MB |
 |
While on your way to the Scythian vessel, you notice Odo and Quark arguing in the Security office. Later,
you and Odo go over every aspect of the investigation up to this point, including the passenger records of the transport ship that was forced to return to the
station. [Quark, Odo]
|
14:14 |
65.2 MB |
 |
You reach the docking ring and make your first attempt at communication with the Scythians.
[Computer, Yarrow, Wey, Rhoon, Dax]
|
5:25 |
22.5 MB |
 |
Back in Ops, Dax has recovered about forty percent of the PADD data, but most of it is encrypted. Once you break the
code, you and Dax listen to Major Kira's proposal for a preemptive strike on the drones. [Dax, Karrig, Computer, Sisko, Kira, Yarrow]
|
11:48 |
53.9 MB |
 |
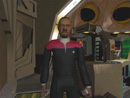
Major Kira and Ensign Carlton are affecting repairs on Turbolift A. You stop in for a chat.
[Computer, Kira, Carlton]
|
4:55 |
21.6 MB |
 |
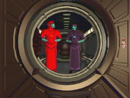
On the way back to the docking ring for your second conversation with the Scythians, you walk in on an
armed confrontation between Odo and the blue Lykotians. [Odo, Renat, Ningh, Sisko, Kira]
|
5:53 |
26.7 MB |
 |
Thanks to Karrig's logs, you now have a plan for better communicating with the Scythians.
[Yarrow, Wey, Rhoon]
|
3:34 |
14.5 MB |
 |
Checking in on Vedek Rasmus Selin, you learn more about the Rising, Terek Nor during the Occupation,
and the Harbinger prophecy. [Rasmus]
|
5:55 |
25.4 MB |
 |
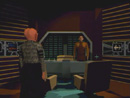
While in Ops, Odo reports to you and Sisko about the DNA scan results before being called by Quark
to his bar. You end up joining them. [Sisko, Odo, Quark, Yarrow]
|
5:09 |
21.3 MB |
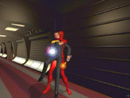 |
Responding to Ensign Yarrow's call, you arrive at the docking ring to confront the Scythians when Yarrow is
suddenly attacked! [Yarrow, Rhoon, Odo, Sisko, Dax, Kira, Quark, Tharen]
|
11:03 |
50.8 MB |
 |
With the murder case now solved, the imminent drone attack becomes top priority: You are to report to
Major Kira in Quark's holosuite for a simulated defensive mission. But, first, you have your last talk with Jani Tharen. [Tharen]
|
4:06 |
18.8 MB |
 |
Just outside the holosuite you find Quark interacting with Rhoon. This completes the first game CD-ROM.
[Quark, Rhoon]
|
1:53 |
8.62 MB |
|
PREVIEW / LINK |
DESCRIPTION |
LENGTH |
FILE SIZE |
SECOND HARBINGER CD-ROM
 |
Before sitting down at tactical you have a personal chat with Major Kira. Soon after the simulation
begins, however, you realize Rhoon has control of the holosuite. [Kira, Quark, Rhoon, Computer] |
7:57 |
36.7 MB |
 |
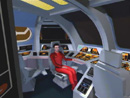
Torpedo sleds have been loaded onto the Hudson, the drones are in position, and the Harbinger has arrived:
This time it's for real. [Wey, Rhoon, Sisko, Dax, Kira, Computer]
|
7:14 |
32.6 MB |
 |
The runabout strike mission on the Citadel's "brain" has failed; Major Kira is injured, unconscious,
and the Hudson is beyond repair. To attempt to beam Kira to safety, you must, first, manually re-route power to the transporter system.
[Computer] |
4:19 |
19.8 MB |
 |
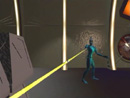
That which terrorizes every player of this game who makes it this far: The suicidal drone maze!
EVERY step you take rolls the dice for one or two drones, of varying difficulty, to appear at random. This sequence serves as an effective
demonstration of the save game function!
|
3:13 |
14.3 MB |
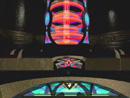 |
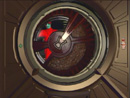
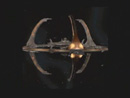
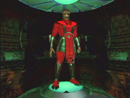
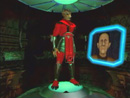
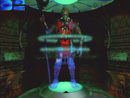
Accessed via the maze are two Scythian power generators that you must activate. This is an example of one of them.
|
0:44 |
2.60 MB |
 |
You managed to locate a chamber at the far end of the maze with a communications room that you used
to contact Odo. This video covers your return to the runabout, your exploration of a second chamber, and your discovery that the Hudson carried a
third passenger to the Citadel: Quark! [Computer, Quark] |
9:42 |
44.4 MB |
 |
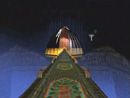
The Citadel's two upper-level bridges connect the chambers to a central command area. Each
trip across a bridge exposes you to random drone attacks, identical to the maze, which become more frequent as time goes on. This video shows
your first successful bridge crossing, exploration of the command area, and first encounter with the Keel holoprogram.
[Keel]
|
5:40 |
25.7 MB |
 |
To stop the Citadel from launching any more attacks, you must gain access to the Master Control
holoprogram. In this video you return to the communications room, contact Odo, and acquire the "Words of Access" from Rhoon.
[Odo, Rhoon]
|
3:14 |
14.9 MB |
 |
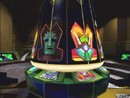
Your first encounter with the Syr holoprogram, which you soon realize is defective.
[Keel, Syr]
|
7:09 |
32.7 MB |
 |
Before re-routing communications Odo informed you that the Nemesis warship has been launched!
You return to the holoprogram interface room to activate Syr, but discover that the Tactical Command holoprogram has reassigned control of the
Citadel to itself. [Keel, Syr, Rhoon, Odo]
|
7:44 |
35.1 MB |
 |
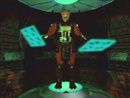
You must find Quark and see if he can help you deceive the Tactical Command holoprogram. To your
surprise, he offers you his refraction mantle in exchange for transport aboard the Hornet. [Quark]
|
6:32 |
30.5 MB |
 |
The Tactical Command holoprogram can only be commanded by Warlord Havik. Unfortunately for you,
he's been dead 900 years! Quark's refraction mantle, however, may be of help.... [Keel, Havik]
|
4:19 |
19.7 MB |
 |
Final Tasks: Destroy Havik's home bank, get back to DS9, rendezvous with the Defiant, and defeat
Nemesis. This concludes the game and our coverage of Star Trek DS9 Harbinger. [Syr, Rhoon, Dax, Sisko, Havik, Computer]
|
8:41 |
38.3 MB |
All videos produced by DOSMAN for the exclusive use of TrekCore.com.
|